Northern Norway offers some of the best chances in the world to see the aurora. With the right equipment and techniques, you can also take home photographs to match the memory.
Few travel experiences compare to standing beneath the northern lights as they ripple across the Arctic sky.
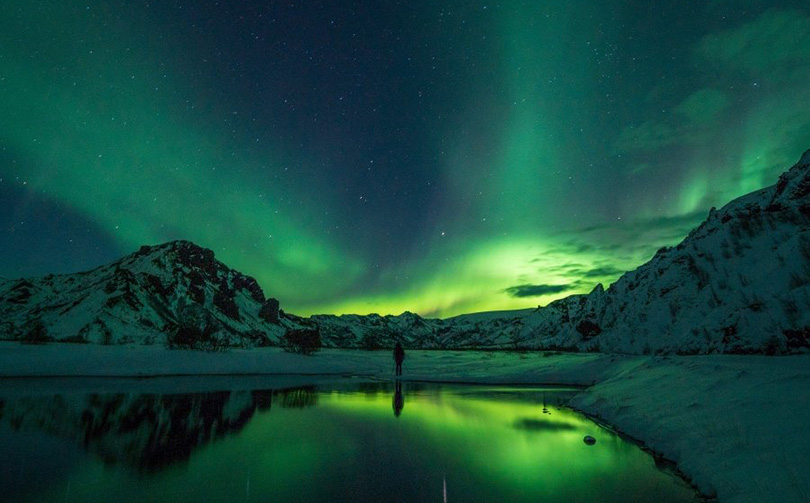
In northern Norway, the aurora borealis can transform an ordinary winter’s night into something unforgettable, a natural performance that feels almost otherworldly.
Capturing that moment on camera, however, is not always easy. The aurora moves quickly, the nights are cold, and automatic settings rarely show the colours as your eyes see them.
The good news is that with the right equipment, a few simple techniques, and some patience, anyone can return home with photos that truly do justice to the spectacle.
This guide will walk you through when and where to go, the camera gear that works best, the settings to start with, and the practical tips that will make your aurora photography a success.
When and Where to Go
The northern lights are a natural phenomenon, which means there are no guarantees. What you can do is maximise your chances by being in the right place at the right time.
In Norway, the aurora is most often seen above the Arctic Circle, in places like Tromsø, Alta, Kirkenes, and the Lofoten Islands. These regions have long, dark winters and relatively good infrastructure for travellers, making them ideal bases for northern lights trips.
That said, the lights can sometimes be seen as far south as Trondheim or even Oslo during strong solar activity, though this is rare.
The aurora is visible from late September until early April, when the nights are dark enough. The months of December, January, and February offer the longest nights, but March and October often bring clearer skies and milder weather.
No matter when you visit, your best chance of success is on cold, cloudless nights, away from the glow of streetlights and towns.
Even in northern Norway, you may need to be patient. Sometimes the sky lights up within minutes, other nights it can take hours of waiting. A flexible schedule, and a willingness to head out more than once, will greatly improve your chances.
Local forecasts can also help. Websites and mobile apps track both cloud cover and solar activity, giving you a sense of when conditions are promising.
Guided tours in Tromsø are another option, especially if you don’t have a car, as local guides know where to find clear skies and can save you the frustration of waiting in the wrong place.
Photography Equipment You'll Need
You don’t need the most expensive gear to photograph the northern lights, but a few essentials will make a big difference.
A camera that allows manual control is the single most important piece of kit. Most DSLR and mirrorless cameras fit the bill, giving you control over shutter speed, aperture, and ISO. A wide-angle lens with a large maximum aperture (f/2.8 or lower, if possible) is ideal, as it lets in more light and captures a broad sweep of the sky.
A sturdy tripod is just as important. Because aurora photography often requires long exposures of several seconds, hand-holding the camera simply won’t work. A remote shutter release or using the camera’s built-in timer will also help prevent camera shake when you press the button.
While traditional cameras offer the best results, modern smartphones are better at night photography than ever before. Recent models from Apple, Samsung, and Google can sometimes capture the aurora with more ease than a complicated camera.
Smartphones do have limitations, and the images are usually noisier, lacking the depth and clarity that a dedicated camera provides. But if a smartphone is all you have, it's still possible to get excellent photographs. Read on for advice!
Finally, don’t forget the basics for Arctic conditions: spare batteries (cold weather drains them quickly), memory cards with plenty of space, and something to keep your gear dry if it starts to snow.
Camera Settings
Once you have the right gear, it’s the settings that make all the difference. Automatic modes rarely cope well in the dark, so you’ll need to switch your camera to manual.
Start with these settings as a baseline:
Aperture: Set your lens as wide open as possible (f/2.8 or lower if your lens allows). This lets in the maximum amount of light.
Shutter speed: Begin with an exposure of around 10–15 seconds. If the aurora is faint, try longer; if it’s moving quickly, shorten to 5–8 seconds to avoid blur.
ISO: Between 800 and 3200 is a good range. Higher ISO values capture more light but also introduce more noise, so experiment to find the balance your camera handles best.
Focus is often the trickiest part. Autofocus struggles in the dark, so switch to manual focus. The best method is to set your focus to infinity, then fine-tune by focusing on a distant light or bright star. A quick test shot zoomed in on your screen will confirm whether the stars look sharp.
Always shoot in RAW format if your camera allows it. RAW files preserve far more detail than JPEGs, giving you flexibility to adjust brightness, contrast, and colour later without losing quality.

Don’t be afraid to experiment. Conditions change quickly, and what works for one aurora display may not for another. Take a few shots at different settings, check the results on your screen, and adjust until you find the sweet spot.
Smartphone Photography
The good news for today’s travellers is that you don’t necessarily need a bulky camera to capture the aurora.
Modern smartphones from Apple, Samsung, and Google are surprisingly capable in low light, and many people now photograph the northern lights with nothing more than their phone.
Most recent models include a dedicated night mode or pro mode, which automatically extends the exposure time to let in more light. When using these modes, it’s best to steady your phone on a tripod or a solid surface, even a small wobble can blur a long exposure.
If your phone offers manual controls, adjust them in a similar way to a traditional camera: keep the ISO as low as possible for cleaner shots, and allow the shutter to stay open for a few seconds to brighten the image. Experimenting is key, as each model processes low light differently.
One of the biggest advantages of smartphones is how they handle focus and colour. Whereas traditional cameras can struggle with stars and moving aurora, phones use computational photography to sharpen details and enhance the colours automatically.
The results may not have the depth or flexibility of a RAW file, but they can look impressively close to what your eyes see — often with less effort.
To make the most of your phone:
- Use a tripod or rest it on something solid.
- Keep the lens clean. Smudges are more noticeable in night shots.
- Turn off the flash.
- Try a few different exposures. The best one might surprise you.
If you’re only carrying a smartphone, don’t worry.
While you won’t capture the same level of detail as a DSLR or mirrorless camera, you can still return home with striking images that remind you of the moment.
Composition in Northern Lights Photography
Settings and equipment are important, but how you compose your shot makes the biggest difference between a simple snapshot and a memorable photograph.
While it’s tempting to point your camera straight up at the sky, this often results in an image that feels empty.
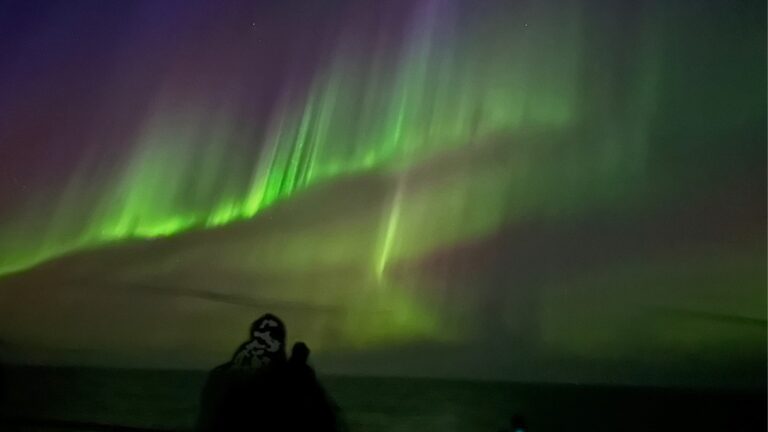
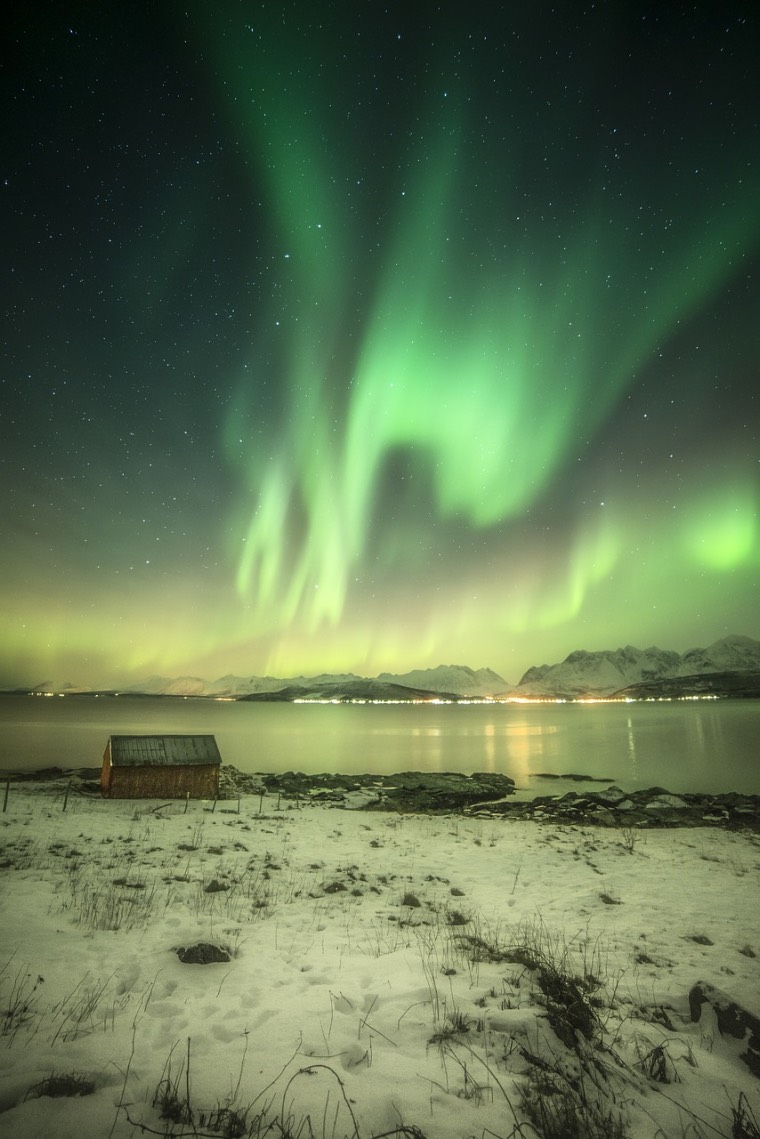
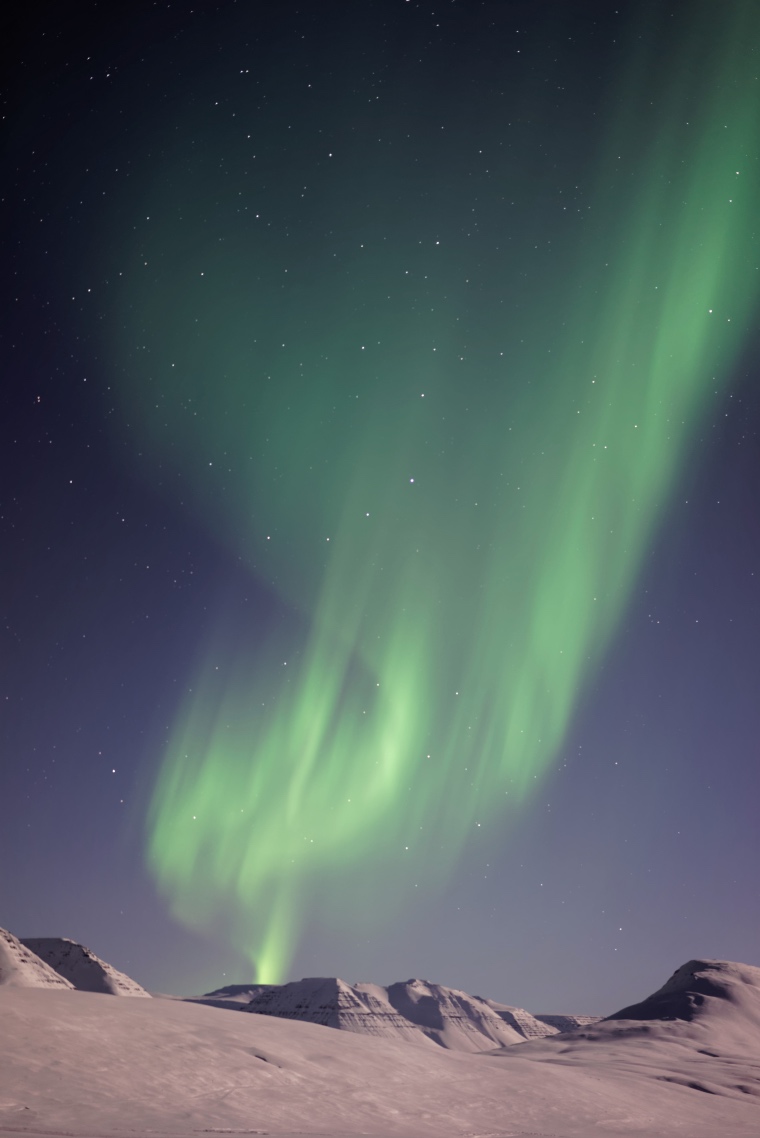
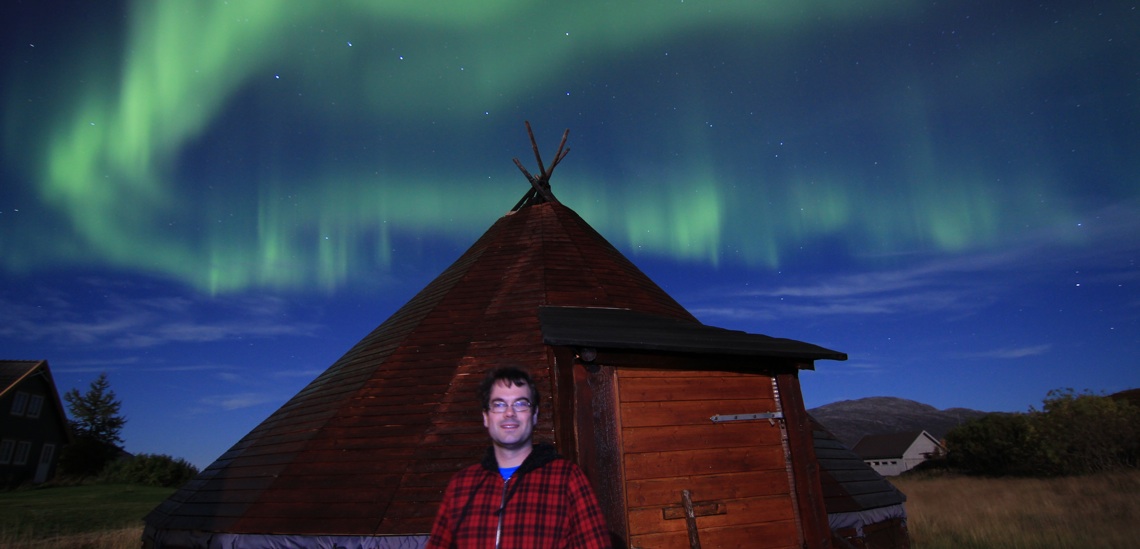
Including a foreground element, such as a mountain ridge, a snowy cabin, a line of trees, or even your travel companions, adds depth and context. The northern lights become part of a scene rather than the scene itself.
In Norway, you’re spoiled for choice: fjords, fishing villages, and Arctic landscapes can all frame the aurora beautifully. If you're on a ship, include some of the ship's structure in the shot.
Pay attention to the horizon. Keep it level and consider the rule of thirds, placing the horizon low in the frame if the aurora is the star of the show, or higher if you want to highlight reflections in water or snowy ground.
Aurora displays are dynamic, so take multiple shots and reframe often. Sometimes the most compelling image comes from a fleeting moment when the lights align with your foreground.
Practical Tips on Northern Lights Photography
Photographing the aurora is as much about endurance as it is about technique. The Arctic environment can be unforgiving, and the best displays often happen when you’ve been waiting in the cold far longer than you expected.
Dress for the conditions. Layer up with thermal underwear, a thick winter jacket, insulated boots, gloves, and a warm hat. Standing still for long periods makes you feel the cold far quicker than when you’re moving.
Protect your batteries. Cold temperatures drain power fast. Keep spare batteries in an inner pocket close to your body, and swap them out as soon as your camera shows signs of slowing down. The same goes for smartphones. They lose charge quickly in freezing weather.
Mind the light. A bright head torch or phone flashlight will ruin your night vision and may disturb other photographers. If you need light, use a red setting or cover your torch with red film to keep the glow soft.
Stay safe. In Norway, many good aurora spots are in rural areas with little traffic or people. Let someone know where you’re going, carry a map app with offline access, and be cautious around icy roads or dark trails.
Be patient. The aurora doesn’t run to schedule. Sometimes you’ll wait for hours before the sky suddenly explodes with colour. Bring a thermos of hot coffee or chocolate, and think of the waiting as part of the experience.
Editing Your Northern Lights Photos
Even the best aurora shots often benefit from a little post-processing. Shooting in RAW gives you far more flexibility, but even smartphone images can be improved with a few quick edits.
The most common adjustments involve exposure, contrast, and colour balance. Increasing the exposure slightly can bring out details in the landscape, while adjusting contrast helps the aurora stand out against the night sky.
Be careful not to overdo the saturation. Real aurora colours are vivid enough without looking artificial.
Noise reduction can also help, especially if you used a high ISO. Most editing software, from Adobe Lightroom to free mobile apps, offers simple tools for cleaning up grainy images. A gentle touch is best. The aim is to highlight what you saw, not to reinvent it.
Editing is also a chance to crop and refine composition. Sometimes a small trim is all it takes to turn a good photo into a great one.
With a little preparation and patience, anyone can capture photographs of the northern lights that bring home not just an image, but the memory of a magical night.