A guide for non-experienced hikers to one of Norway's most famous walks. You can do it, but you need to be prepared.
This summer me and my partner had a chance to visit Norway for the first time. It was my second attempt to finish the hike to Trolltunga. The first time I failed miserably and stopped halfway as I was unprepared and weather didn’t treat me well either.
Fortunately, this time both of us completed the hike. I think we over-prepared but it paid off well. So, I’m going to share my tips for planning your trip to Trolltunga.
Read more: Hiking in Norway
By the way, We are not experienced hikers, in fact, we didn’t train for this.
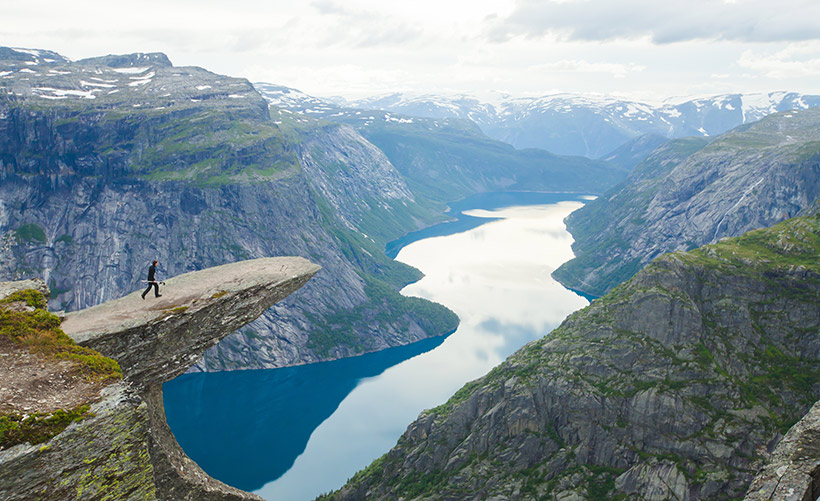
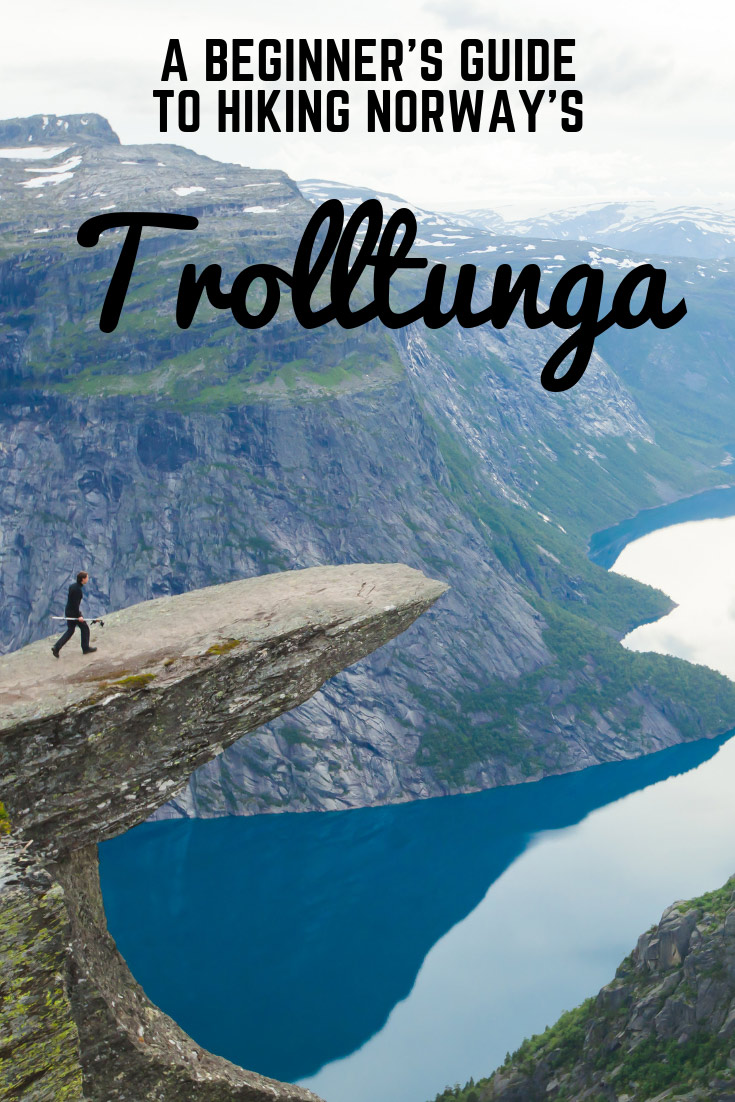
So, what is Trolltunga? I’ll let the picture speak for itself. Here it is:
It is your insta-worthy big piece of rock sticking out from a cliff. You can also call it The Troll’s Tongue. And yes, that is me sitting down thinking about life at the edge of the rock.
What makes this view spectacular is not just because of a rock that looks like a tongue sticking out but the beautiful fjords and mountains that come with it.
The hiking trail spans about 14km one way and on average it takes 10 – 12 hours to walk from the starting point to Trolltunga and back.
The journey to Trolltunga is tough, even tougher for non-experienced hikers but you will be accompanied by many breathtaking scenes along the way.
When should you do this hike?
We did this hike in the second week of August. The sun rise at around 5.30am and set at around 9.45pm so we had about 16 hours of daylight. 16 hours should be more than enough to finish this hike even if you take your time.
While Visit Norway recommends doing this trip anytime between 15 June to 15 September, you could have this hike until late October, or from late February with a guide. As a beginner, I recommend doing in early July where the weather is better and has longer daylight.
Where to stay near Trolltunga
If you have a car, great! You can find an accommodation in Tyssedal. This town is nearer to the starting point (Skjeggedal). If not, you can stay in Odda or Tyssedal. There are shuttle buses in these towns to bring you to and back.
We didn’t stay in any of these towns however. The first time I went up to the mountains I saw a couple of cabins. I wondered if we could stay in any of these cabins, and we found a listing on Airbnb! (Google “Trolltunga Cabin Airbnb”).
The cabin was located about 5km into the trail, skipping the first difficult part of the trail. We stayed for 3 days, first day we complete the first ascent and rested for the night. Second day we complete the rest of the trail and slept in the cabin. Third day we went down. This way we saved a lot of energy and we could take our time to walk to Trolltunga.
If you feel adventurous enough, you can bring along your tent and sleep somewhere close to Trolltunga. This way you can reach Trolltunga at sunrise for a magnificent Instagram photo.
How to get to Trolltunga from Oslo and Bergen
For us, we had friends to drive us straight from Bergen to the starting point. It took about 4 and a half hours. We could go late since we were going to stay up in the mountains anyway. But there are many options even if you are not driving.

If you are coming from Oslo, you can take the NOR-WAY Bussekspress to Odda. The bus leaves at 11pm and arrives at 5:25am. After which, take the 6:30am shuttle bus to Skjeggedal. You can take this route if you want to save one night of accommodation and do the hike on the same day.
If you are coming from Bergen, you can take the Skyss bus 930 to Odda. The earliest bus leaves at 8:20am and earliest time to reach Odda is at 11:15am which would be too late to start the hike. Unless you are planning to camp near Trolltunga, you should find a place to stay in this town and start the hike early in the morning.
You can also take the train to Voss, then take Skyss bus 990 to Odda. This route is shorter. However, the earliest bus also reaches Odda at 11:15am.
As a first timer to Trolltunga, I’d recommend staying for a night, get on the earliest shuttle bus to the starting point and start your hike. If you are in a group of four, you can book a taxi and go even earlier.
Also make sure you are able to come back to the starting point by 8pm to catch the last bus back to Odda. The first time I went to Trolltunga, I missed the last bus and had to hitch a ride back to Odda. Fun times.
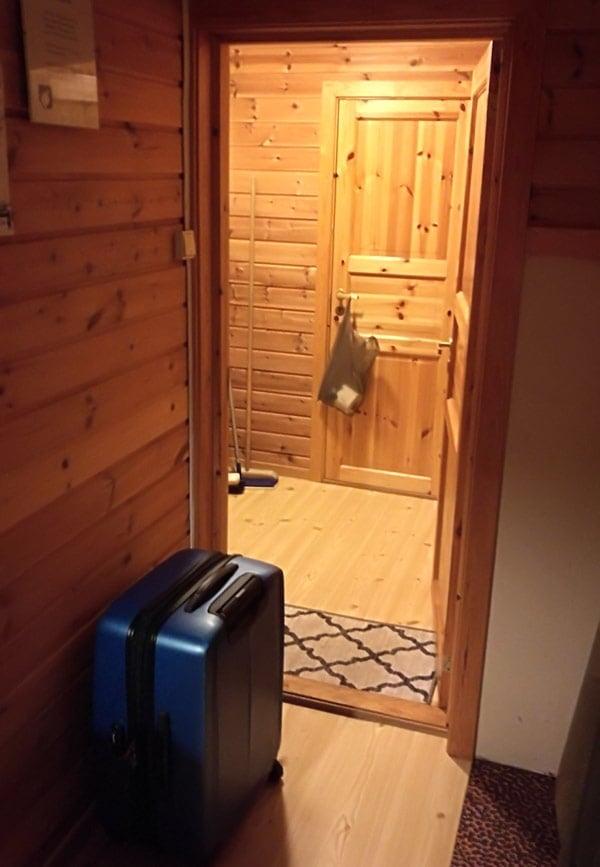
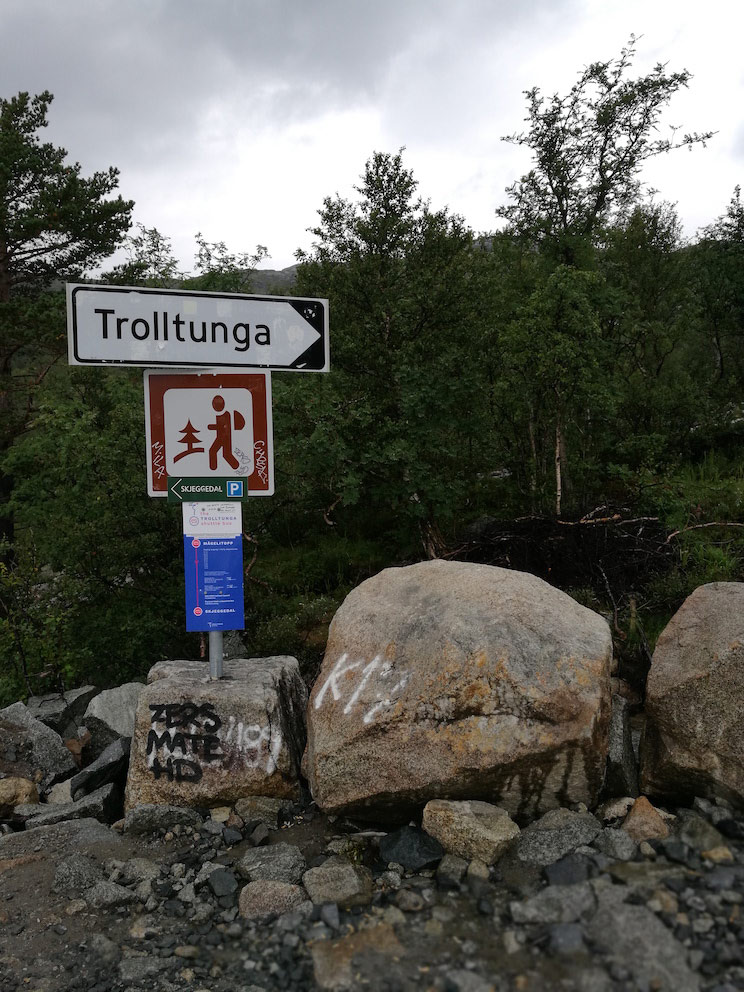
The start of our hike: Heading to the cabin
So, I hope I have prepared you enough for this trip. Now I’ll be talking about my experience and what you could expect out of this trip.
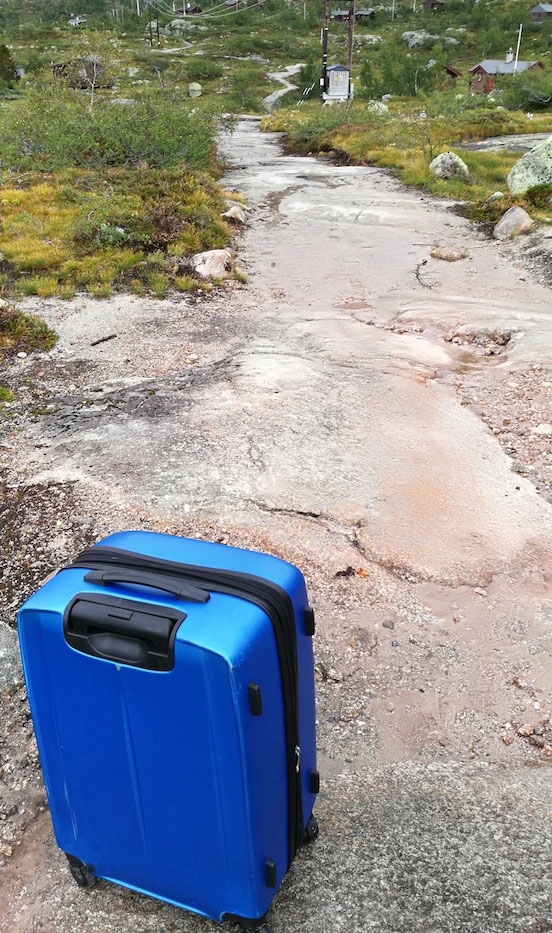
On our first day, we reached the starting point at around 3pm. We thought about climbing up to the mountains to go to our cabin. Apparently, there is a carpark area near the cabins and there is a shuttle bus that travels from the start point to the top.
The area at the top is called Magelitopp. Luckily for us, the shuttle bus was still operating so we took the bus up, saving our leg from walking that 4.5km uphill. It costed us 140NOK each but was totally worth it. We brought our luggage up too, crazy eh?
It is a 10-seater bus that only operates for a certain period of time. One thing to note is to bring credit card, the bus driver will have a card machine onboard. You can also take this bus from the top to the bottom.
The bus then took us up to a carpark area near our cabin. The carpark is a private area and according to my Airbnb host, you will need to pay 600NOK for a 24-hour parking. It has a limit of 30 cars so be sure to arrive early to get a slot.
We saw this road to our cabin and instantly regretted bringing our luggage. After dragging the baggage for about an hour, we finally arrived at the cabin.
The cabin was clean and had all the necessary equipment like a stove, microwave, an oven and a fridge. There are bunk beds and it can sleep up to 6 persons. There is also an outhouse beside the cabin to do your usual business.
The only thing lacking was running water so I had to walk to the nearby stream to collect it. I carried a 25 litre jug. Water rationing became a thing because the walk from the cabin to the stream was on a rough terrain and carrying a full 25 litre jug can expense your energy really fast. I didn’t want to go back for a second round of water collection.
After filling our stomachs with simple dinner, we turned in for an early night.
Continuing on our journey
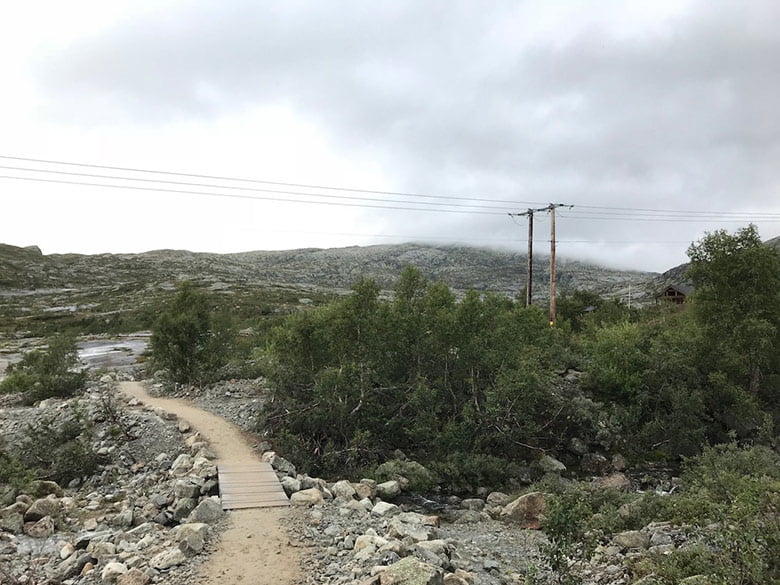
The sun was out early at about 5.30am, so we ate our breakfast and headed out. From the cabin, we were left with about 8km to Trolltunga. We walked to the same stream that we collected our water from. This was the start of an intense upslope.
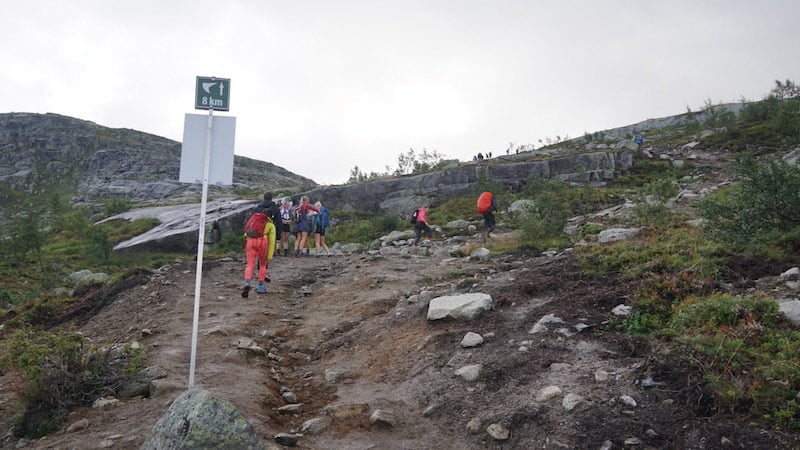
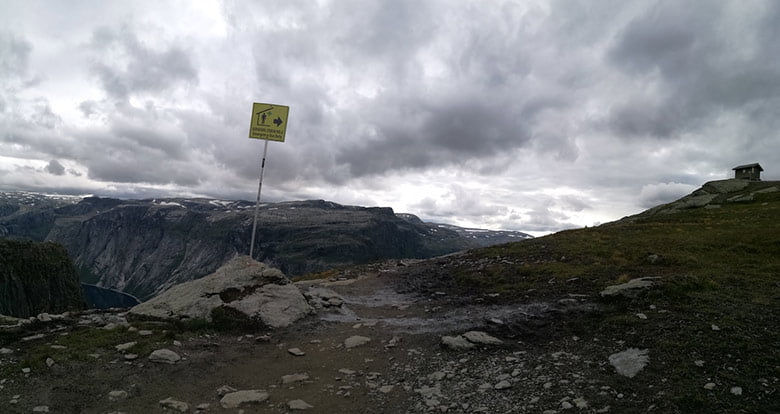
At every kilometer of the trail there is a sign board stating the remaining distance to Trolltunga.
We were going upwards for about a kilometer plus and we took a lot of breaks along the way. The top rewarded us with a good view before we continued on our journey. The remainder of the walk was easier.
The weather was rather dramatic, it rained for a short while and the temperature turned cold. I had to put on my down jacket to keep myself warm and dry. And after half an hour the sky turned clear and the sun was raging at us.
I then took off the down jacket because it was getting too hot. The weather continued in this pattern throughout the hike.
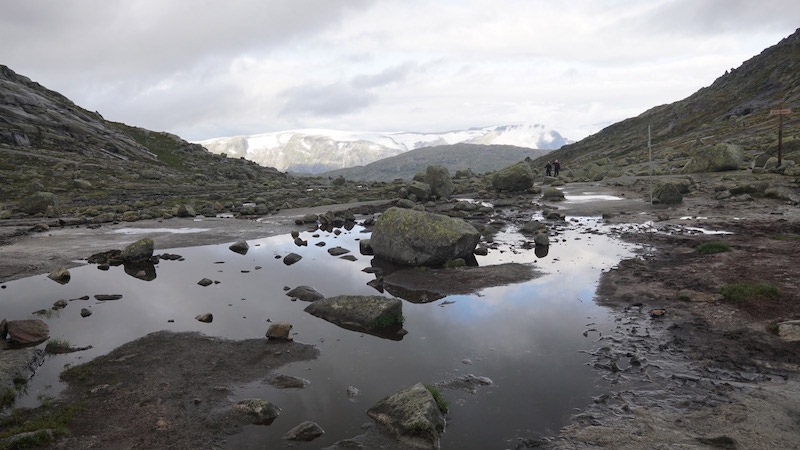
Along the way, you would be able to see a lake on the mountain. Some hikers would pitch their tent beside a lake. There are two survival cabins along the trail for anyone to seek refuge in case of inclement weather.
We took a long break here because the landscape beauty is too irresistible. From here onwards till Trolltunga, it was all about the mind power. Every remaining kilometer of the trail took us about an hour to complete and we started to tire out.
We took longer breaks and started snacking on chocolates and peanuts to get calorie and mood boost. After toiling it out for about 5 hours we reached our destination: Trolltunga.
Behind the scenes of every Trolltunga photo
If you go on Instagram and search #trolltunga you will probably see people doing poses at the edge of the cliff rock, as if they were the only ones there. Nope, it was crowded like this…
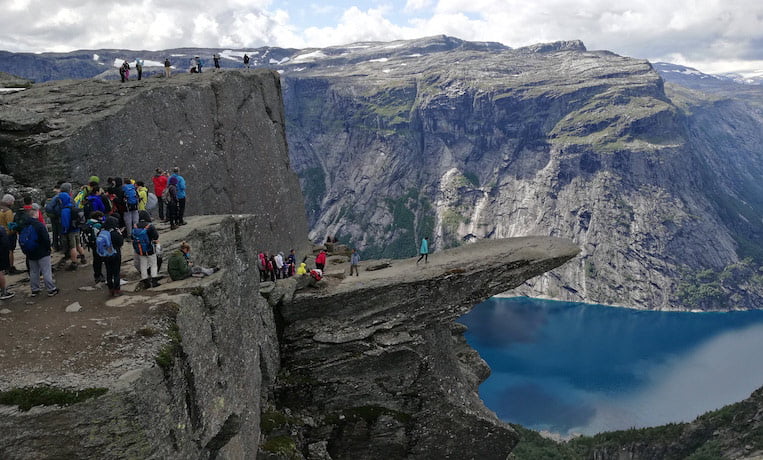
I’m imagining your jaw dropping now. Yes, people were queuing up for the shot of their life. We heard people queuing for at least two hours to take their photos. It was the same case for us.
You can see people queuing from the top to down to the cliff rock. There are steps to climb down to the cliff. It is a narrow path to the cliff so do take extra caution here.
Now you may be asking, how did me or other people took the photo at a different angle? It doesn’t make sense to ask the next person behind the queue to take for you because that angle does not have the best view.
Well, you will have to trust a stranger with your camera because that stranger will be much further behind in the queue. But it is very easy to point your photographer to the spot to take the photo because there will be many people standing on the same exact spot shooting the same angle.
End of the hike
We spent a long time at Trolltunga. We didn’t need to worry about heading back so early since we would be staying in the cabin for another night. Since the shuttle bus leaves from Skjeggedal to Odda at 8pm, you should already start leaving this place at 2pm.
This is also why I recommend going as early as possible so you can allocate more time to go back. Besides, if you can reach Trolltunga earlier in time, there should be less people in the queue.
On our way, back we saw a couple of mountain guards. I think they are there to keep a look out for any hikers in trouble and to also warn any incoming hikers from proceeding to Trolltunga if it was too late in the day.
By the time, we were back at our cabin, we were exhausted. Our legs and shoulders ache badly. For someone who doesn’t go hiking that often, this doesn’t sound too bad. That night I slept soundly.
The next morning, we packed our stuff and head down using the shuttle bus service. This time it cost us 70 NOK each (not sure why there is a difference in cost when going up). The road is narrow and seem scary as the bus go downhill. Any wrong move could cause the bus to fall from a high height. But I’m glad we all made it to the bottom safely.
What should you bring?
- Waterproof backpack because it can rain a lot in a day.
- Waterproof boots. This is very important because most likely you will be walking on wet ground and over streams.
- Water bottle. There are plenty of streams to collect your water.
- Water purification tablets. The water is cold and fresh but if you are still skeptical of bacteria, these pills help.
- At least 2 layers of clothes. As the weather can change drastically from hot to cold, you need to be able to quickly put on a thick layer to keep warm. I wore a quick drying long sleeve top as the first layer, fleece as the second layer and down jacket for the last layer. In the end, I only used the first layer and added on the down jacket when it rained.
- Comfortable long pants. I saw some people wearing shorts, maybe that works for you if you are not afraid of the cold. There are people wearing jeans though.
- Lunch. I had a sandwich with canned tuna and an egg.
- Banana. It is portable and a good source of energy.
- Snacks. I snacked on cashew nuts along the way.
- Chocolate. Optional but I think it helps a lot. Get the ones that look like buttons from Freia. They taste awesome and are mood boosters. Every time you feel like giving up, you can pop a button into your mouth.
- Trash bag. For you to dump your food waste and always protect the environment.
- Camera. I highly recommend bringing your DSLR with wide angle lens to take amazing photos to show off to your friends. After all, there are many check points with glamorous landscapes. I’d also suggest bringing a video camera like GoPro on a head strap or a chest strap so you can document your walk.
Top tips for first-time hikers
Other than snapping insta-worthy photos from this trip, I’d like to end this article with some useful tips for anyone who is going Trolltunga for the first time, and especially for people who are not an experienced hiker like me:
Wear the right gear, especially a pair of waterproof boots, because you will most likely be walking on muddy and wet grounds.
If you’re hiking alone, maybe consider bringing sports earphones and play music along the way, this should keep your mood high.
You should be drinking a lot of water but you don’t need to bring a 2-3 liter water bottle because there are plenty of drinkable streams. Bring water purification tablets if you are paranoid. This way you can save some weight on your backpack.
The ground is very rough, tie a proper knot on your boots or shoes so you are not prone to ankle injuries.
If there is an available cabin to cut some distance from the trail, I highly recommend booking it. If not, there are camping areas along the trail to pitch your tent.
Start as early as possible. If the sun rises at 5.30am then try to be at the starting point at that time. This would give yourself a lot of buffer time and longer breaks if necessary.
Don’t expect to complete the hike on the first time. Anything can happen along the trail, especially with such erratic weather. You can always come back to complete the hike another day, as I did.
That’s all folks! This is what I wanted to share and I hope you gained a lot from it. If you are heading to Trolltunga and would like to know more, please feel free to ask me in the comments section.

It sounds like an amazing hike!! I wish I could hike that far, but don’t think it’s possible. (I have chronic pain issues). BUT, I love to hike and see beautiful scenery! I could probably hike 5-6 miles. Would it be worth it, if I could only go that far? I know, of course the best would be to hike to the end, but if it’s just not possible, wondering if we should still try and see how far we can get???
Thankyou!
Sorry this took so long!
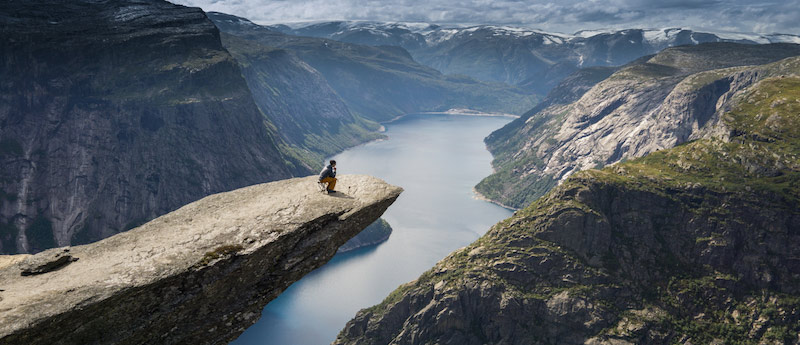
5 – 6 miles that’s translated to about 8km. I’m thinking this is 8km to and fro? If that’s the case you might want to consider taking the Magelitopp shuttle bus to the top. The first 4KM is an uphill trail all the way and I don’t think there is anything to see in this first 4KM, take the bus and you can skip the first 4km uphill :-).
After the bus brings you to the top, you can hike for another 4KM, it will be a flat terrain for the first 2KM and then uphill again but once you reach the top you will be presented with a good view 🙂 (See the picture in the When you should do this hike? section)
Like you mentioned, the best is still hiking to the end. Would it be a good idea to take much longer breaks and camp overnight?
We did this during the recent heat wave (July 25, 2019) We were out in the sun for 10.5 hours. It was pretty rough for us as 55+ age with 2 months of hiking practice (not hilly practice), but with perseverance, we made it! We definitely had too much weight in our packs, and to much clothing for cold weather, and lugging water. It did get a little windy and we put on windbreakers, but did not have to wear the down jacket or fleece. That said, It would be prudent to have these items with us anyway. We did not want to wait 90 minutes for the “insta” shot as it was more about the journey and we honestly could not Stand in a line! We spent our hour on the peak eating and laying down to rest for the 5.5 hour trip down. The trip down was much harder as we were tired and probably dehydrated from the hours in the sun. Also, we had to pee behind a big rock and the fear of having to do that prevented me from drinking adequate water. This was dangerous I see in retrospect. My husband ran a fever all night for 12 hours after the hike. Probably from early heat stroke. Luckily after salt/fluids and food he was ok in the morning.
Glad you all made it through the heatwave! I think it’s tougher not because of age but rather the climate.
I totally understand how you feel when you are making the trip down. Actually, when we reached Trolltunga our body has already started aching, and it could only become worse when we started walking back. We had more breaks as well so the walking back part took a much longer time.
Yes, about peeing behind a big rock, that’s same for me as well. There is quite a lot of people walking on this trail and you have to go quite a distance off the trail to do your business. Not sure if you noticed but there is a lot of rubbish lying around the area for peeing and it was pretty unsightly.
Hi! As a Norwegian and someone from Odda, I thought I should comment on this post so everyone who wants to hike Trolltunga get some intel from locals:)
As the post says start early, it’s lesser people and if the weather is sunny it’s not that hot yet.
The mountain guards is at the trail to keep the hikers safe from pushing themselves to hard and also tell people that it’s too late to finish the hike in safe manners. When the Trolltunga hype started the local Red Cross who’s managed by volunteers had to rescue 44 people from Trolltunga because they where underestimating the mountain. The hike is hard, the weather is treacherous because you walk by the edge of a big plateau called Hardangervidda, and she’s moody when it comes to rapid changes in the weather. Also there was a girl who died from falling down from the Trolltunga. Be prepared with good shoes, a good rucksack, lots of food, bring a bottle of something sweet to drink along with water so you have quick energy. It’s no shame of not completing the first attempt, better to return halfway than injuring yourself.
Have a safe trip!
Good to hear from you Erle!
Thanks for your comments. You’re definitely right on the Hardangervidda being moody. I’ve seen really clear skies and then sudden heavy downpour and then back to clear skies again.
And I’m with you on not completing the first attempt. On my first attempt to climb Trolltunga, I had muscle cramps during the halfway point. It was so bad that I was limping back to the starting point. And yeah… I had to rest a few days after to get back my mobility.
Hello, Nice article.Very informative and helpful. Can you also please share the link of the cabin that you mentioned? I am seeing that there are many accommodations available and not sure which one would be best. Many thanks in advance.
Hey Rony, sure. I booked this cabin on AirBnb (https://www.airbnb.com/rooms/19723354). I’m not sure how long Bente will list this cabin for but feel free to check it out while its still available.
Do take note that this cabin is about 4km+ away (or maybe more I can’t remember) from the starting point. There’s a long uphill stretch of road so it might seem like a challenge to even go to the cabin. There’s bus that brings people from the starting point to the top of the hill so you can take it if you’re right on schedule.
If you’re staying in the cabin, please clean it up after you leave and bring down the rubbish. (I didn’t and it caused inconvenience for Bente, sorry Bente!)
Hope this helps!